BIBLIOGRAPHY:
Kiely, J (2011) Water Works Intimate Landscapes: Authothouse Publishers: USA
REFERENCES:
Baldwin G, et al. (2009) Looking at Photographers: A guide to Technical Terms: J. Paul Gerry Meseum: UK
Buselle, M. (1987) The Photographer's Question and Answer Book: Revised Edition: Collins Publishers
Freeman, J. (1999) The Photographer's Manual: How to get the best picture everytime, with any kind of camera: Annes Publishing Limited. UK
Jeffrey, Ian et at al. (2008) How to Read a Photograph: Understanding Intepreting and Enjoying the Great Photographers :Thames and Husdon Publishers: UK
Langford. M, (1986) Basic Photography Fifth Edition: Eagle Colourbrooks: Focal Press
Friday, 21 December 2012
Friday, 30 November 2012
Brief 1: Exterior Location
Below are my chosen images for the exterior brief. I chose to do garages and petrol station for this particular assignment.
For this task I was particularly inspired by Ed Ruscha's 26 Gas Stationsdidn'tphoto shoot. His main aim was to reproducing 26 photographs of gasoline stations next to captions indicating their brand and location and this is exactly what I was trying to achieve.
A useful technique in night photography is the long exposure. The effects that can be captured with a long exposure are stunning and have an ethereal quality. The most important tool that you will need is a sturdy tripod, and a DSLR camera that allows for long exposures.
This is my best images


As I’ve stated above, the lower the ISO the smoother, cleaner, and better images, lower ISO images will also be more accurate in colour and more captivating. ISOs between 100 and 200 will give the best results, and depending on the image sensor and the camera’s engineering, ISOs of up to 400 can also still be clear, clean and sharp. This picture is the one I really wanted to print, but I realised when it was too late that it was the wrong one. I still hope John will mark this one instead.
 Aperture f4.5 ISO 100
For this image I set my camera to aperture priority, and also experimented with the flash.


I photographed this petrol station because I was trying to imitate the one below done by Photographer Ed Ruscha. Although the one he photographed seems to be deserted and very well isolated, the one I shot was done just a couple of weeks and probably his was shot years back after it had been closed down.


 For this shot I used a mate's Canon EOS 5D, just to see if I would get the same results as my Nikon D90. The aperture was set to f/5.0 and because I was stood behind the bushes I had to zoom in and therefore I used 24 mm focal length. The ISO was set to1600 at shutter priority.

 Shutter Speed 1/100 Aperture:F16 ISO: 160

![]() The reason I chose this image is didn't I quite like the reflections on the road. It was raining when I took this photograph and I like how you can see the lights and signs reflecting in water on the ground.
The reason I chose this image is didn't I quite like the reflections on the road. It was raining when I took this photograph and I like how you can see the lights and signs reflecting in water on the ground.

For this task I was particularly inspired by Ed Ruscha's 26 Gas Stationsdidn'tphoto shoot. His main aim was to reproducing 26 photographs of gasoline stations next to captions indicating their brand and location and this is exactly what I was trying to achieve.
A useful technique in night photography is the long exposure. The effects that can be captured with a long exposure are stunning and have an ethereal quality. The most important tool that you will need is a sturdy tripod, and a DSLR camera that allows for long exposures.
This is my best images

It was shot at around 5pm. When photographing signs at night, one of the most important factors is light metering. The combination of a bright sign and a dark background can confuse the camera, meaning that you can end up with an under or over exposed image. For this is I needed an accurate metering mode, e.g., spot metering for a balanced shot. I also used a tripod to avoid camera shake and turned off the flash because I was too close to the sign.
As I’ve stated above, the lower the ISO the smoother, cleaner, and better images, lower ISO images will also be more accurate in colour and more captivating. ISOs between 100 and 200 will give the best results, and depending on the image sensor and the camera’s engineering, ISOs of up to 400 can also still be clear, clean and sharp. This picture is the one I really wanted to print, but I realised when it was too late that it was the wrong one. I still hope John will mark this one instead.

For this image I set my camera to aperture priority, and also experimented with the flash.

Image by Ed Ruscha

I photographed this petrol station because I was trying to imitate the one below done by Photographer Ed Ruscha. Although the one he photographed seems to be deserted and very well isolated, the one I shot was done just a couple of weeks and probably his was shot years back after it had been closed down.

Image by Ed Ruscha


Shutter Speed 1/100 Aperture:F16 ISO: 160
This is also amongst my favourite. I just love how you see all those reflections in the water. The sky is gorgeous and it was a beautiful sunny day. The image may be overexposed here and there but I do like how you can see almost everything in one image. To improve this image, I should have twicked a few things in photoshop in order to get the correct exposures and tones


Aperture f16 ISO 200

This is an image by Photographer Ed Ruscha which I tried to imitate. It didn't quite work out the way I hoping it would, but I still like my image above. For me shooting these images was at times challenging as it quickly got dark. Experimentation was very important for this exercise and was the key to my success of most of my images which required a wider aperture, a higher ISO rating and some flash so that the images would not become too blurry. I was usually working with shutter speeds of 1/15th of a second or slower, so therefore using these settings allowed for better images.
Thursday, 29 November 2012
Assignment 4: White Balance
White balance is basically a way to measure the temperature of light and to balance out the colours of your photography for the desired results.

White balance (WB) is the process of removing unrealistic colour casts, so that objects which appear white in person are rendered white in your photo. Proper camera white balance has to take into account the “colour temperature” of a light source, which refers to the relative warmth or coolness of white light. Our eyes are very good at judging what is white under different light sources, however digital cameras often have great difficulty with auto white balance (AWB).
An incorrect WB can create unsightly blue, orange, or even green colour casts, which are unrealistic and particularly damaging to portraits. Performing WB in traditional film photography requires attaching a different cast-removing filter for each lighting condition, whereas with digital this is no longer required. Understanding digital white balance can help you avoid colour casts created by your camera’s AWB, thereby improving your photos under a wider range of lighting conditions. Hoy A (2005)
| Color Temperature | Light Source |
| 1000-2000 K | Candlelight |
| 2500-3500 K | Tungsten Bulb (household variety) |
| 3000-4000 K | Sunrise/Sunset (clear sky) |
| 4000-5000 K | Fluorescent Lamps |
| 5000-5500 K | Electronic Flash |
| 5000-6500 K | Daylight with Clear Sky (sun overhead) |
| 6500-8000 K | Moderately Overcast Sky |
| 9000-10000 K | Shade or Heavily Overcast Sky |

These are the two images I have tried to take using different white balances. The first image was taken on shade and the other on fluorescent and hence the first image came out slightly darker than the second image. I personally prefer fluorescent or auto white balance to shade as they produce better quality images.


Brief 2- Interior Location
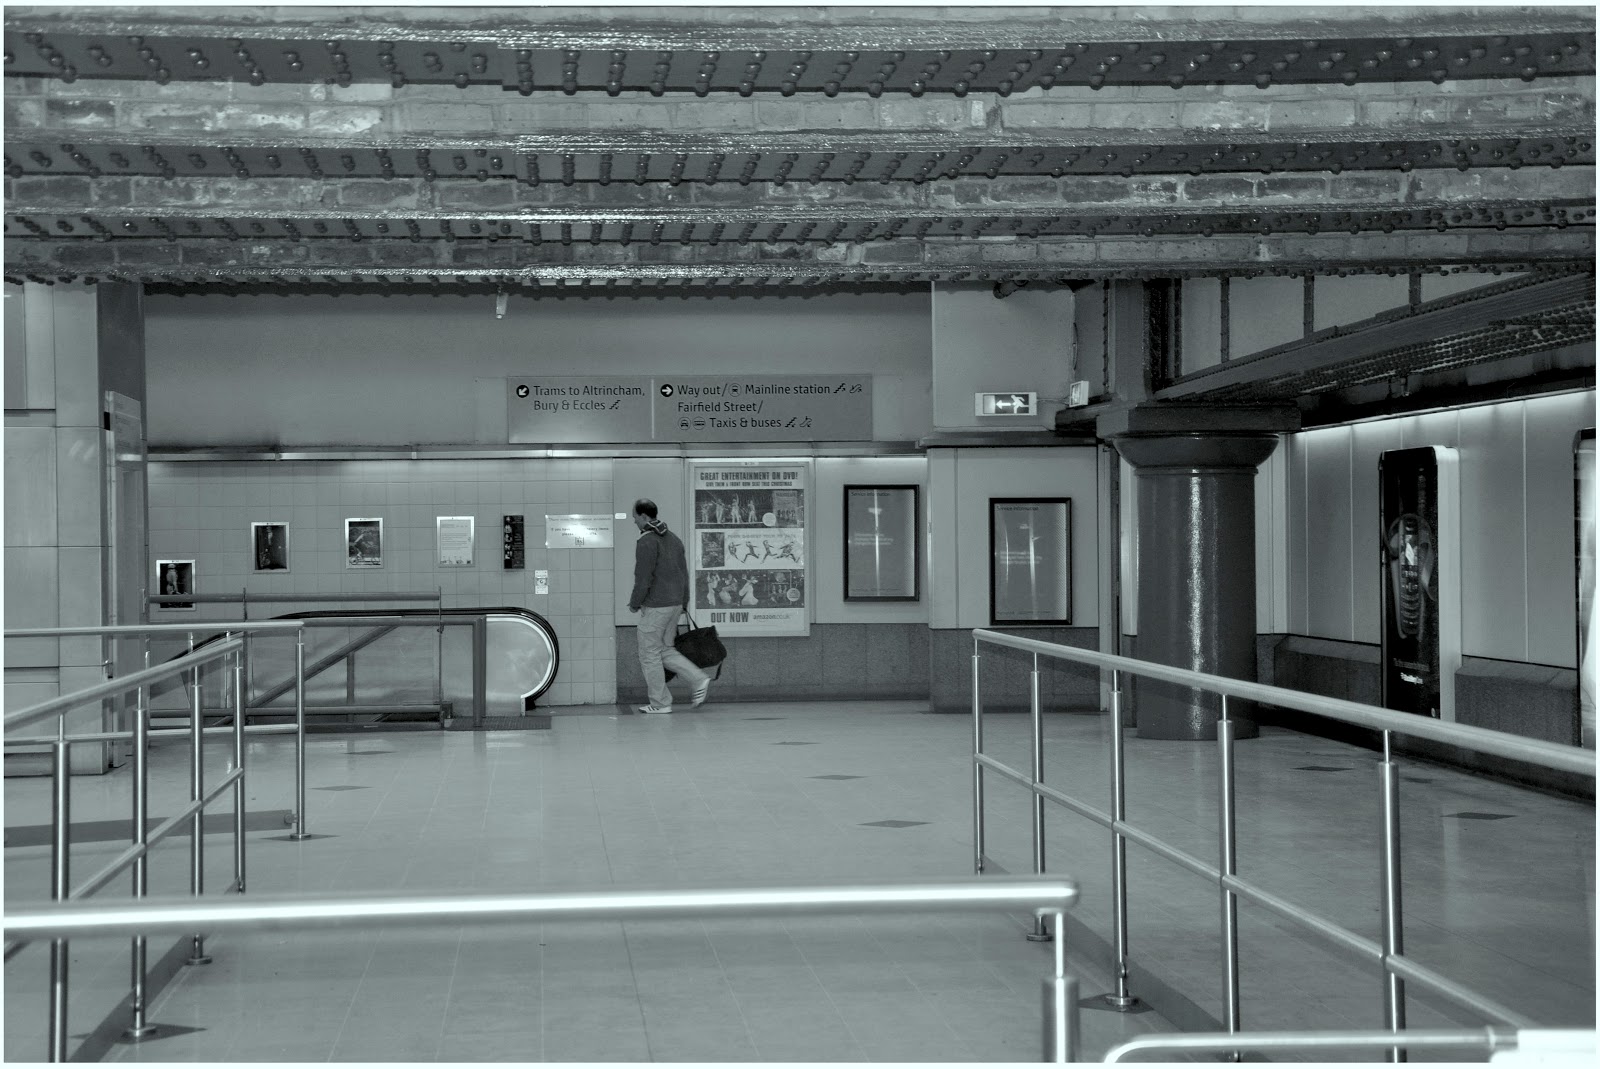
MANCHESTER TRAIN STATIONS- INTERIOR
For my interior I chose to do something totally different. I went for the train station and decided to do a few shoots inside the station and below is a brief explanation of the task.

I shot this image with a Nikon D700 camera. I played around with the settings and figured that having the ISO on 400 will make the image more sharper.

I took this image on the internet to show what I was trying to achieve and I wanted to use it as a reference.


For this image I tried to get good depth of field. The exposure I used was 1/500 and the aperture f/6.3
with a focal length 47 mm. I put my ISO to 800 and then changed the image to black and white.
1 sec f 11 ISO 1600 22mm
I initially shot this image in colour but however decided to change the tones and colours to come out with this image. In Camera Raw I first straightened my shot, then aimed for a neutral output by correcting the exposure. I used the recovery option for overexposed areas, but was careful not to push it, so as to avoid clipping. I also used the over andunder-exposed alarm from the Camera RAW histogram.
Once I was satisfied with the overall exposure I then exported in PSD and opened up the image in Photoshop.
In Photoshop, I went for a filter (black and white). From this filter option you can control all the color channels and convert the information into black and white contrasts (manually or with presets). I then had a go at changing the blending mode to soft light and repeated the filter a couple of times, playing with masks to bring the attention on a element of the composition.


1/200 f11 ISO 800 55mm
Task 2 Create A Blog!
I created my first ever blog on 24/09/2012, this is when I started the Level 3 Diploma in Photography. So I have decided to share a few pix of me myself and I... eNjOy!!!

Wow I have no idea what sort of shutter speed this is.
But here is a better one!

Ye, so here we have it, at least I'm beginning to get the hang of it.
Now I can move on to task 3 with a bit of confidence :)
Assignment 2: Shutter Speeds

When conducting my research I discovered that a useful technique in night photography is the long exposure. The effects that can be captured with a long exposure can producestunning results and have as well as producing good quality images. The most important tool that I needed for this type of shoot was a sturdy tripod, and as well as my DSLR camera that allows for long exposures.
Below is a perfect example of a long exposure by Tom Anderson. I came across his work on blogger. He evidently knows how to use different apertures and shutter speeds to come out with very good exposures.

But the most important thing is I did try.

I still have a long way to go in terms of knowing the different exposures especially how they relate well things such as f stops, aperture, etc. I'm hoping to achieve this by the end of the semester so that I will be able to take much better pictures. This will also help me get a better understanding of how aperture and shutter speed together are used to control the different exposures.

Mortion Blur

Lower ISO ratings produce color-accurate, smooth and aesthetically appealing images and this requires ideal lighting conditions. However, there are some subjects that you want to photograph in low light conditions. Or, you may want to stop fast-moving objects (a humming bird, a race horse or a carousel). In both situations, you need higher ISOs to capture those images with an acceptable exposure. Unlike film, with a digital camera you can increase the ISO with the touch of a button, and this flexibility makes it much easier to get the image you want. So with the higher ISOs, you can use faster shutter speeds to eliminate motion blur and/or camera shake. In the event that you want to use motion blur creatively, then decreasing the ISO is simple, and you can then decrease the shutter speed (less than 1/30s) to achieve the desired motion blur and still have smooth, noise-less images.
Task 1 Location Photography
A bit of a brainstorm on Location Photography.
It is the type of photography done at a particular venue or location for example, landscape, architectural photography, wedding etc, rather than in a studio. Sometimes professional photographers refer to "location photography" referring to the access they may have to shooting at a client's location rather than at their own studios.
Location Photography.
It is the type of photography done at a particular venue or location for example, landscape, architectural photography, wedding etc, rather than in a studio. Sometimes professional photographers refer to "location photography" referring to the access they may have to shooting at a client's location rather than at their own studios.
Below is a diagram of the different types of location photography.
 |
| LOCATION, LOCATION, LOCATION.... |
Subscribe to:
Posts (Atom)